Ad sense auto

Google analytics

Friday, March 4, 2016

An antique looking bowl with plants in it and a silver table for a dollhouse


These are the items you will need one silver coaster or any coaster that you like for the top of the table, and a bottom from a candle holder that you put in a window.  


I spray painted the candle base to match the silver coaster.  Both of these pieces get glued together.


Here they are drying upside down these are your table.


This is a salt and pepper shaker, you can buy this type at the dollar store, you will need the top for a bowl. Don't throw out the bottom all you need is a solar light top on it to make a light for a dollhouse.  I showed how to do that in my other blogs.


In this picture you can see the top on the right.  I spray painted the top black for the bowl. Next is the little stand that goes under the bowl.


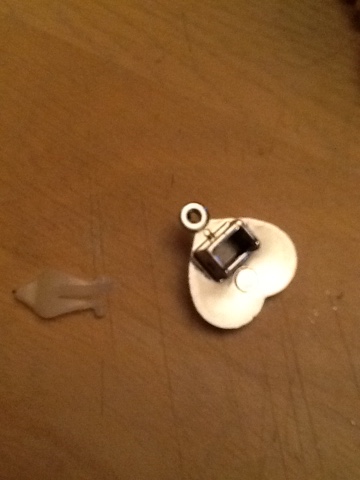
This is the cap off a water bottle, this will be the stand. This gets glued to the bottom off the bowl.


Here's both pieces together.


I had a card with a beautiful picture on it so I shrunk it down.  I also ripped around the edges so it didn't look fake and square.  I glued this picture onto the black bowl with mod podge.


This is the gold paint I used to paint a design on the bowl.


This is what it looked like at this point.  Now I need to add rocks in the bowl, fake plants.


This is what it looks like with the rocks and fake plants.  Once the plants are in the bowl I held it all in place by putting hot glue around the whole inside.  It makes the plants look like they were just watered. Next picture you will see this on the table.


Here is the bowl on top of the table.  Use your imagination make the flower arrangement the way you want.  I hope this give you some ideas.


Thursday, March 3, 2016

Making minature bowls from candy plastic holder and also food from different wood pieces.


I'm sure some of you buy this type of candy.  If you look on the brown plastic you will see the areas where the plastic looks like popped up small circles. Carefully cut out these popped up circles these are your bowls.


Here's the circles after their cut out.


I then painted them a gold color.  I also liked the decorative pieces on the sides so I cut them out to as you can see in the photo.  I will be using these in a future post.


For the food items cut out pictures from your grocery store ad that will fit on the wood pieces that I will show you in the next pictures.


That's right scrabble pieces and wooden dowel pieces which I cut down to the size I needed.


For the scrabble pieces I put on these two labels.


I also did scrubbing bubbles for the bathroom.  When I make my refrigerator I will fill it up with food.


Here's the ones I used the pieces of wood dowels.  I also painted the rest of the items wood colors that would match them.


These are larger dowel items.  I hope this give you some ideas.  Next I will show you what they look like on the bookcase.


Here's a picture of the bookcase with items in it.


Here's another area of the bookcases.


Make a bookcase out of your Valentine's Day candy box for dollhouse


This is the candy box I'm using.


The first thing you need to do is cut the ends off the candy box, make sure the size is going to be the size you want your bookcase to be.  Don't throw out the rest of the box you need it for the back wall of the bookcase and the shelves.


You need to slide one side of the box end into the other.  You need to trim one of the sides down so they are the same on the inside areas.


You need to cut a piece off your left over candy box for the back wall on the inside for your bookcase.  You will also need to tape up the bookcase around the sides that they were put together.  Then glue in the back wall.


Next take the sides piece of the candy box and cut them to fit as shelves.  You will see this in the next photo.


As you can see in this photo I wanted two shelves in my bookcases so I cut two pieces.  You need to bend the ends down so you can glue them in the bookcase.


This is what it will look like at this point.


I then went on the Internet and looked up images of bookcases with items in them and shrunk the pictures down and glued them on the back walls to look like there are items on them.  I also painted the bookcases.


This is a closeup.  In the next blog I'll show how to make some food, dishes to put on the shelves.


This is another closeup.


Making a minature portable record player for a dollhouse


You will need a jewelry box for the record player case.


Next thing you need is a piece of black plastic.  You need to cut a circle out of it for the record, after you cut out the circle you need to take a small screwdriver and scratch in circles around the record to make it look like a record.


This is a closeup of what the record will look like.


Next go on the Internet and look up images of record labels, print one out and glue it to your record.


Now to make turn table.  You need a milk cap and one of these silver pieces that you see in the photo. Make a hole in the middle of the milk cap so you will be able to fit the silver stem into it.  You need to paint the milk cap white before inserting the silver item.


This is what the top of the turn table will look like with the silver item in it.


This is the underneath part.


Next take a piece of black foam board and glue it down inside the jewelry box.


You need to first glue the record onto the milk cap.  Then glue the milk cap onto the black foam board on the inside of the record player.  Make sure you glue it towards the top left area, you will need to put in other items.


At the dollar store they sell cheap plastic earrings in the toy area, you are going to need the little square piece in the back of the earring.  Cut the areas around the square.  This will be the piece that the arm of the record player will be glued into.


You will need one of these bamboo forks for the arm.


This is what one of the forks look like.  You need to cut off the two pointy forks off, don't throw them out one of these is going to be used for the record player needle.  You also need to cut some off the other end, you won't know how much until it is put into the square holder so you know how long it has to be for the record player.


You also need little beads for under the silver square piece from the earring, and also for the record player knobs.  I bought this from the dollar store it was a necklace.


This is the picture of the silver square piece off the earring with one of the gold beads glued under it.  This will be the holder for the arm of the record player.


This is the arm glued into the silver earring piece. 


In this picture you can see that one of the fork points was glued under the wooden bamboo fork.  You can also see there was some cut off the fork for the length of it.  You can also see two beads that were added to the inside for the record player.


In this picture I added alittle square piece for a lever for the speed, I also painted a mark for the area under the lever for the speed dial part.  I also painted the arm button tops and the needle.


This is the side view of the record player. I also painted a little red mark in the area where it would hold the needle.  Every doll needs a record player in her house.  In my next blog you will see a bookcase that I made from a Valentine's Day candy box.  You could make some more records for the record player that sit in the bookcase if you want to.