Ad sense auto

Google analytics

Monday, September 9, 2013

The church is finally finished wait until you see what it looks like!!!


In this picture you can see on the inside of the church a top of a solar light, which I turned into a hanging light for inside the church.  I took an electrical wire from one of the lamps that I take apart and I put it back together inside one of the solar light pieces.  I then put a piece of wood across the top and installed the light on a hook that was originally used to hang up coffee cups.  Now the inside of the church lights up nice and bright, I can't see anyone falling asleep during mass in this church.


This is a view of the front wall of the church I put a figure of Jesus on the front wall.  You can also see the organ.


This is a downward look into the church from the top.  You can see the alter which I put a chalice on it and a dish with communion wafers in it.  I also put an open bible on the alter which is hard to see in this photo.  There are also two candle stick holders with fake candles in them on both sides of the alter.


This is the top over the front of the church.  You can see I have a roof over top of the front which I shingled the roof.  I also took an older frame and put in a different picture in it.


This is located in the back of the church.  Everyone needs a place to pray and meditate.  The fence is made of the sticks that hold up solar lights with a glass bulb on top of them.  The cross railings are made of popsicle sticks.  The fence is painted black.  There is a miniature bird bath looking item in the middle with a small glass on top which the solar light is installed on top of.  This whole area lights up at night due to the solar light.  Inside the bird bath I put decorative pieces of purple glass material.  I also put 1 decorative ceramic tile under the bird bath.  I put in fake flowers and made some benches out of the balsa type wood and put some red felt on top of them.  I also glued down a couple rocks on the ground.  Under this church there is a plywood platform with fake grass carpeting installed on top of it to look like a lawn.


This is above the garden in the back of the church.


This is one of the sides of the church and you can also see some of the front.


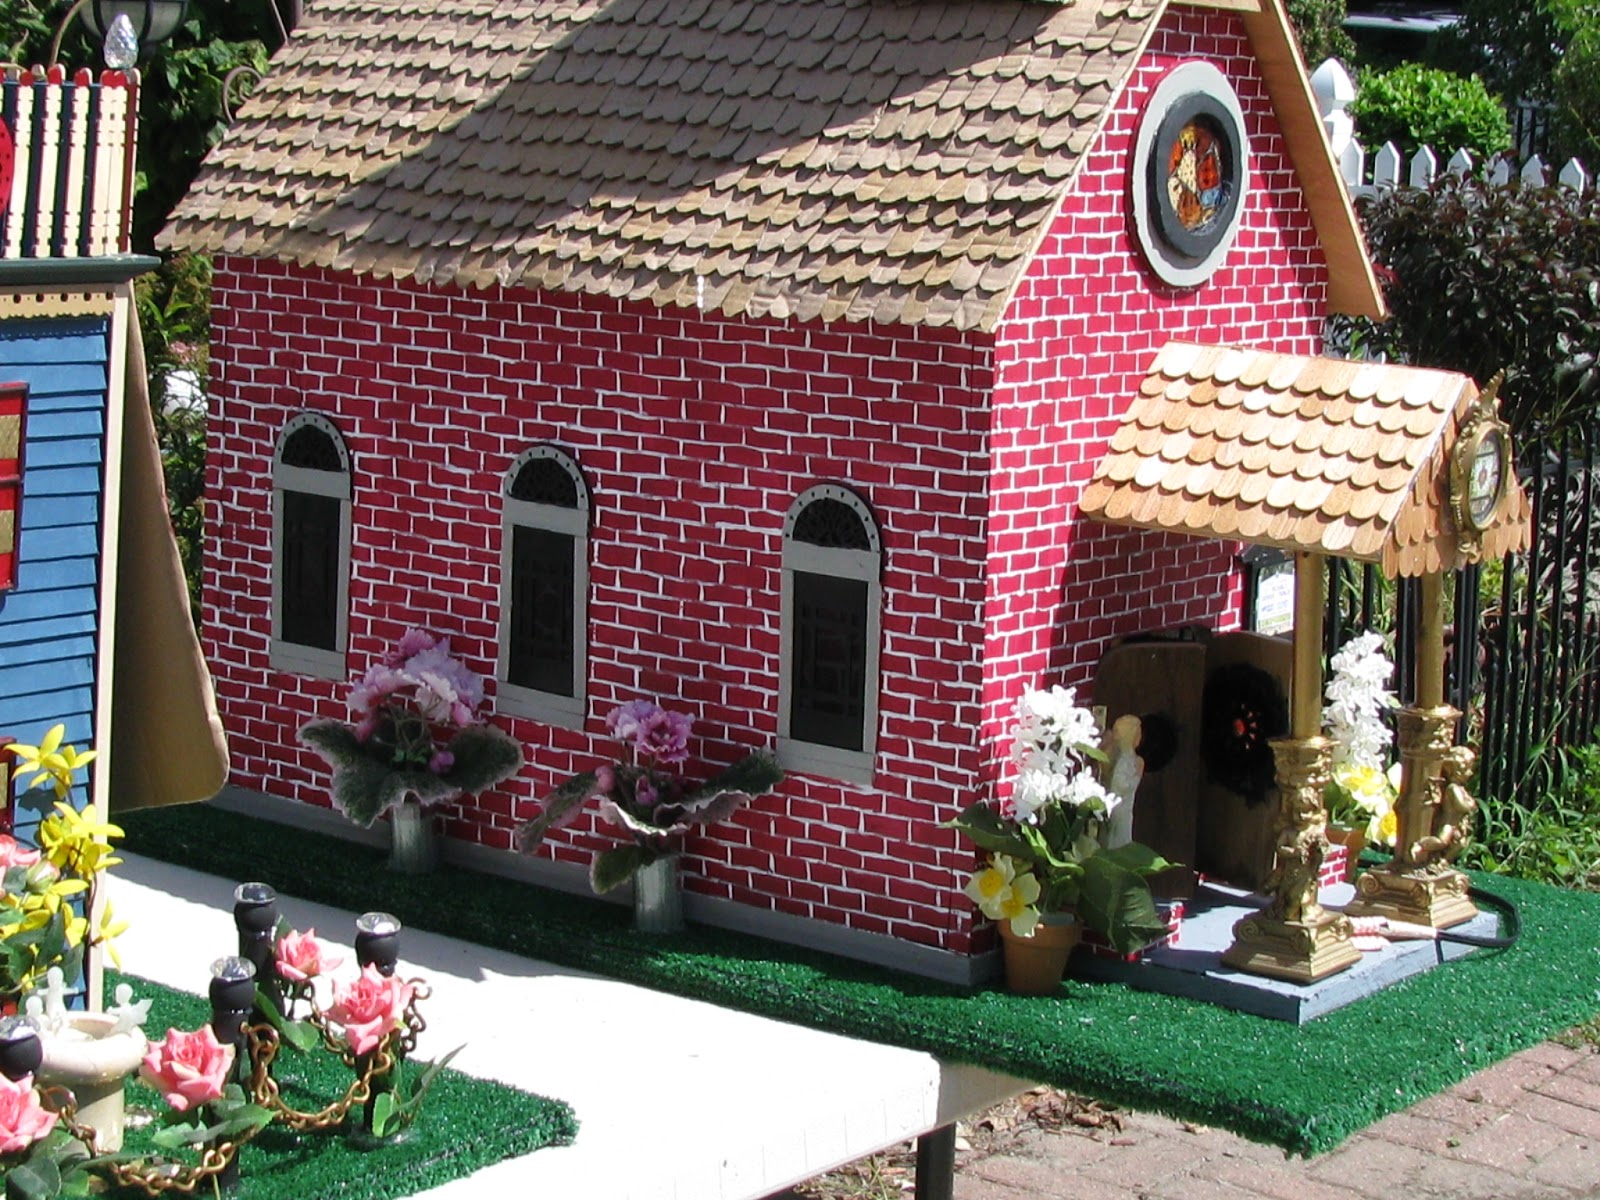
this is what the top of the church looks like.

This is what the front of the church looks like.  I have two angels on both sides of the doors.  I made red brick looking stands under the angels.  I also took two candle stick holders that have angels on them and put in two of the solar light sticks to look like they are holding up the roof overhang area.  There is also some fake flowers in the front.  The sign on the front of the church reads: St. Michaels Church which is hard to see on the right side of the picture.  I also have a platform under the columns that I painted gray after putting down wood pieces for flooring material.


This is another view of a side of the church.


This is what the old pipe organ looks like finished off.  I also made some fake books with church music for the organist.


I put some pictures on the walls of the church in between the windows, all different pictures that have to do with Jesus.  I painted the pews and installed some red felt on the pews for the seating area.

This is another view looking down into the church.


This is the front of the church view.  I put in a baptism font on the right side and in front of that is a sign which stands in the church to tell everyone what verse to look up in the bible.  The baptism font was made from a glass turned upside down and on top is the cap off a koolaid container.  I painted it white and installed decorative blue glass for the water.  You can also see a close up of how the light is being held up in the church.


This is a view looking down into the church.  You can see the pews and I also made some little bibles for inside the holders behind the pews.  I also added some crosses to the sides of the pews.   I hope this gave you some ideas just in case you want to build a church of your own.  I also added some pieces of trim wood under the windows to make it look like the window sill.


Friday, September 6, 2013

The third phase of the church I'm working on, stained glass looking windows and fake brick siding.


This is what the church looks like at this point.  First I painted the whole church a beautiful red color. Then I made it look like a brick church by drawing lines and painting them white.  The bottom of the steeple on top of the church I installed popsicle sticks to make it look like lap siding and painted it white.  The middle part of the steeple I painted red and made it also look like red bricks.  I also added shutters which were made of popsicle sticks and put a trim around them with popsicle sticks.  I painted the shutters white.  The top of the steeple I made cardboard shingles and installed them and painted the roof black.  The very top of the steeple I added a piece from a light fixture and also made a cross out of a dowel and painted it gold to match the light fixture piece.  I also added the fake stained glass (which is the window film from Home Depot)  This window film is amazing what it makes windows look like, like real stained glass.  


In this picture you can see the top of the roof which I need to install more cardboard shingles which I make out of the cardboard which holds water bottles in the store or the cardboard from the Gatorade package.  You will see the roof finished with the cardboard shingles when I post it.  You can also see another view of the fake bricks.


One thing I didn't mention I finally tried using my wood burning kit which I got from the craft store, for making the steeple have red bricks on top.  The wood burner worked out great it gives you depth of a real brick.  You can also see a close up of the top of the church.  I have some people asking me if I sell any of my items I always sell them so I can make more of them.  I love making things!  In the photo you can also see the bell in the steeple which is a pencil sharpener.


This is a close up of the front of the church, you can see the fake stained glass window.  I installed two foam circles (different sizes) around the window to give it depth and a frame.  I painted one of the circles gray and the other black.


I made a light for the inside of the church which I will post in the near future.  I made a light out of a top of a solar light and a wire from a lamp.  You can see how the church lights up.  I also put a bell in the tower which is a pencil sharpener it works GREAT!!


This is what it looks like right now with the light lit.


You can see how the fake stained glass windows light up.


You can see what the front window looks like lit up.  I installed the window film over top of a wooden decorative piece I bought from the craft store.  make sure you check out my blog on Monday I finally finished the church!!


Thursday, September 5, 2013

Second phase of the church

 
Every older looking church needs a pipe type organ.  So I built one.


This is an alter that I built out of different items.


I needed to build the pew so here they are, I made 8 of them 4 for each side.


Another view of the pews.


Here's another view of the top of the pipe organ which I still need to paint.


This is a close up of the bottom.


Here is another picture of what the organ looks like.


Wednesday, September 4, 2013

Now I'm working on a church

 
My husband built me a church, so now I'm working on finishing it off.  What the progress as it turns into something beautiful!  Here is a picture of what the church base looks like.


Here is a picture of the steeple and the roof section.


I'm showing you one of the sides which I will be turning into stained glass looking windows using the window film material for windows.  Keep an eye on my blog every day so you can see the progress.


Tuesday, September 3, 2013

The middle of the mid-evel looking light fixture turned into a hanging solar light.


This is a reminder picture of the middle piece of the mid-evel looking light fixture.


This is what I did with it.  I'll explain what was done with it.  First of all I had all the bars hanging out the sides of the light where the side pieces were taken off.  I took solar lights and cut holes in each of the clear plastic enough that they would slide right over top of the bars on the side.  Once the solar lights were over the sides I added wood beads to the bottom of the solar lights.  I painted the wood beads red so they would be seen better.  I hung this light in my greenhouse it lights up at night without having an electrical wire.  All the solar lights light up.  I hope you can see what you can do with an old broken fixture, don't throw it away make something new!  I hope this gave you some ideas.  This fixture was made of a heavy metal type material.


Monday, September 2, 2013

Mid-evil times looking light turned into solar powered sidewalk lights.

 
This is the mid-evil looking light that I took apart.  When I first got it one of the side pieces was broken off but hanging by it's wires.  I decided to cut off all the side pieces.  You can see one of the side pieces on the right, the rest of them were already taken off.  The middle section I made something else out of you will see it in my next blog, don't miss it.


This is a close up of one of the sides of this light.  You can see the area where one of the side pieces was removed.


Here are the side pieces that were removed, I painted them a black color.


In this picture you can see PVC pipes, I cut enough of them for all the side pieces I had.  I made them 3 foot tall.  I also bought some hangers that were for hanging things in the shed or garage and put them on the tops of the PVC pipes.  First I had to drill some holes in the PVC so they would just fit right into them.


You can see a picture of what the finished lights look light.  The PVC pipe was painted black just like the light pieces.  The side pieces fit down inside the holders.  I also put solar lights in the area on top that there use to be lights.  I also put caps on top of the PVC pipes.


This is another  one of the lights that I made.


This is another one that you can see.  Out of one broken light fixture I got 5 solar lights for my walkway.  Wait until you see what I did with the middle section of the light.