Ad sense auto

Google analytics

Friday, January 22, 2016

Making a curtain rod, curtain and a topper for a dollhouse


The first thing I do is get a piece of good cardboard material. The cardboard that holds water or if you do canning the boxes are good too. I measure the window to see how far down and over I want the topper to be. I marked the lines with a pencil.  The next picture you will see the paper cups I used to make the decorative cutouts for the topper.  I place the cups next to each other and draw the half circles on the cardboard.


In this picture you see the cups I used.


You need to score the ends so you will be able to bend the ends back.  


I used felt for this window, you can use any material for a different look. Customize it!


You can see in this picture I cut out the half circles in the cardboard.  I also made lines on the material which I will cut these lines for slits for making the circles easier to glue the material to.


In this picture I cut the slits.


If you look in the picture I folded the ends.  Under this picture you can see three popsiclestricks which I use to make curtain rods for the other curtain that goes under the topper. I measure the window for the curtain rod to be the right size for the window.  Make sure the Popsicle sticks are shorter than the topper or the topper won't fit over top.


This is a look at the popsiclestricks on their sides.


This is a front view of the sticks. This is the front you will be putting your curtain on.


This shows the material I glued on for a curtain make sure you leave extra on top so you can glue it over the top for a finished look.


This is the finished look on the rod.


This is the curtain which is glued over the top of the window.


Now back to the topper. This is the material glued to the cardboard. As you can see the ends are folded in these are the areas that you glue it to the wall. 


This is what the front looks like at this point.


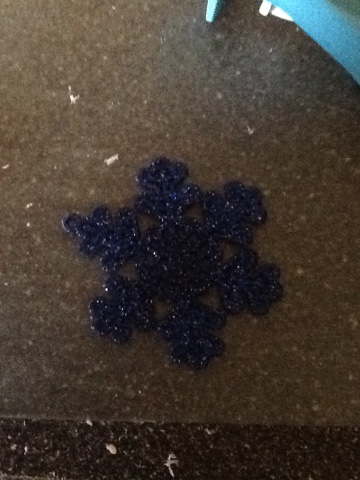
I'm using this snowflake for a piece of decoration on the topper. I'm cutting a piece off of it.


In this photo I glued on the piece off the snowflake. I also glued on lace around the bump out curtain.


I wanted to show you what the back looks like.


This is what the window looks like with both curtains up.  You can use any material, customize it.  If you wanted to you could also make tie back curtains for the bottom.  Hope this gives you some ideas. It's cheaper to make curtains for your dollhouse.


Wednesday, January 20, 2016

A table for a dollhouse


First I used a piece that was from a dollhouse kit, once you punch out the wooden pieces for a dollhouse keep the scrap wood.  The scrap wood can be used for making items for your dollhouse.  I also cut a piece of wood the size that I wanted the table to be.


I used Popsicle sticks for this part.  In the photo you can see the Popsicle sticks that I cut down to fit in different areas on the table top.  On the two sides I cut 2 pieces of sticks glued to each other for just the two sides.


I cut two pieces off the scrap wood for the long sides of the top of the table.  On the two short sides I cut Popsicle sticks for the trim.


This is one of the sides with the Popsicle sticks.


I used long square matches for the legs.  I cut them to the size I needed.


This is the underside of the table.  I hot glued the legs into the corners.


At this point this is what the table looked like.


I used this ribbon for decorating the table.


This is the top of the table.  I also printed out a picture and mod podged it to the top.  I cut pieces off the trim and put it around the top. I painted the table first before adding the detail work.


Tuesday, January 19, 2016

2 elegant looking chairs made for a dollhouse, made of Popsicle sticks


I started by cutting three pieces of Popsicle sticks for the size I wanted the seat to be.


I cut two pieces of Popsicle sticks to hold the three pieces together


I then cut four pieces of the sticks for the size of the back of the chair.


This is the back which I also added two pieces of sticks to hold it together.


I then covered both the back and the seat with felt.


This is what the back looked like.  I then cut two pieces of plastic from a red shampoo bottle the size of the backs of the pieces to cover the back openings.


I used decorative Popsicle sticks for trim on the back of the chair, also the front area of the chair. The circle is made of a cork material I cut it in half.  I used half of the circle for on top of the back of the chair.  I also used a decorative circle which I cut some pieces off of and glued it on the half of the circle.


In this photo is what the chair looks like before and after paint. The legs are plastic pawn pieces out of a cheap game from the dollar store.  I glued the back and seat together.  For braces I used Popsicle sticks.  The arm rests are made from Popsicle sticks and small dowels.


Friday, January 15, 2016

Making a lamp for your dollhouse from a toothpaste cap


These are the pieces I am using.  A small glass salt shaker, a toothpaste cap from sensodyne toothpaste tube. In the middle is a piece from a cap off something, a water bottle cap and a metal piece for the top of the lamp.


First I took the salt shaker and took the cap off, I then glued on the plastic cap to make part of the lamp.  I then glued the toothpaste cap on top of that and the water cap on top of that.  On the top I added the metal piece. 


I then added some lace material to the lamp shade.  I hope this gives you some ideas!


A medicine cabinet made out of a top off a small wooden box.


For this project I started with the top of a small wooden box, I used the bottom of this box to make a bed which you can see in one of my other blogs.  You need the top, some wood, a large Popsicle stick, some hinges which came off this box. The long sticks you won't be needing.


You need to print out a picture of the inside of a medicine cabinet off line for the size to fit the inside of the box top.  After gluing in the picture cut down the Popsicle stick to make two shelves.  You also need to put on the hinge on the side.


These are the pump parts to soft soap pumps.  When you take these apart you will end up with many pieces to make items.


You need to cut down a piece of thick wood to attach to the top, connect the hinge to this part too.  On the front you need to put a small mirror.  Instead of throwing out that makeup case that you used the makeup save the mirrors they are great to use for a dollhouse.  I made a frame around it with bamboo from a placemat.  I also put on a piece that came off another box to make it look like a handle.


This is the inside.  I used different pieces off the soap pumps to make little bottles, I used the tubes for this and I cut circles with a paper puncher to make a top and bottom for the bottles.  I dipped the tops of the bottles in white paint and let it dry to look like a cap on top. I also made a little decorative bottle from a piece off the pumper to make a cotton ball holder, I also used a bead and a piece of a jewelry item for the top.  You could print out minature medicine labels and put them on the bottles.  I took q-tips and took the cotton and put it into the decorative bottle before adding a top and bottom. I hope this gives you some ideas.


Thursday, January 14, 2016

A bed made from a small wooden box


These are some of the pieces I will be using.  A small wooden box that has hinges on it, a piece of wood which is a piece from something I took apart for another project. I also am using a piece from a broken pin.  Also a wooden coaster.


The first I did was take the hinges off the box, I'm using the bottom piece of the box.  I turned the piece over so the flat part is on top. I then attached the one piece of wood to make a headboard.  Next I'm going to cut a wooden coaster to make a footboard.


Here's the wooden coaster after I cut it, I am taking off the pin that's on the top.


I then added the coaster to the bottom.


I made a mattress from a piece of batting which I glued some material on it.  I then hot glued it to the top of the bed area.


I painted the bed a pink color and then hot glued on the mattress.


I am using one of the domino pictures for the headboard area.


Here's the bed after adding a little decorative painting and you can also see the domino picture on it and also the pin on the footboard.


I made a blanket out of a piece of red felt. I hope this gives you some ideas of how to make a bed out of a box, use items that you have, personalize it!