Ad sense auto

Google analytics

Sunday, August 25, 2013

Rugs are in the doll house!


The rugs are in!  This is a view of the inside.


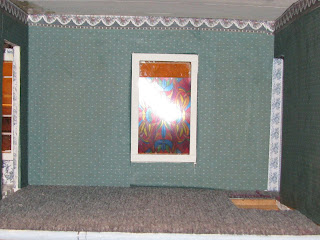
This is one of the bedrooms in this home.  You can see the window in the front which I will be turning into a stained glass window in the future.


This is the parlour area which I installed a gray rug.


This is the kitchen area which I installed contact paper which looks like a wood floor.


This is the dining room  area located next to the kitchen which I decided to install a beige color rug.  I thought it would look nice in the dining room.


This is the bathroom area located just above the dining room area.  I thought a rug would look nice in the bathroom.  I use carpet squares for my doll houses.


In this picture you can see the kitchen below and bedroom above.  Next I will be installing wallpaper on the walls.  So many choices, this is the fun part.  Remember you can use contact paper for flooring in a doll house.


This is the second phase of this doll house.  As you can see I added wood lap siding out of popsicle sticks and reinstalled the windows which had to be taken out in order to side the house.  I also took the front door out and added hinges so it will open and close. I also added a door knob.


This is what one of the sides of this home looks like right now.


This is what the other side looks like at this point.  Next what I will be doing is adding the carpeting to the inside which I will post on my blog.


Saturday, August 24, 2013

A NEW DOLL HOUSE I'M DOING!!

 
This is the doll house which I just got,  When I get done with this doll house it's going to be beautiful!!  Watch my blogs to see the transformation.


This is what the inside looks like.  Well now it's time to get to work.  I'm going to be making furniture also for this house like my other doll houses.


Friday, August 23, 2013

A Lisa Doll house which was refurbished. Doll house was from the 70's


 This is what the dollhouse looked like when I got it.  This doll house was made in the 1970's but it could use an uplift.  This house is made of two pieces the top and the bottom which come apart.


I painted all the trim work on this dollhouse black and also put wood lap siding on the whole house made from popsicle sticks.  The back of this doll house is just a flat wall.  the side I will show you in the next picture.  


you can see the wood lap siding made from popsicle sticks and also I made windows for this house it didn't have any windows installed when I got it.  I painted yellow around the windows to make them stand out better.  I also added roof shingles which I made from cardboard like I did with my other doll house blogs.  I painted the roof black.  I just added some dolls and accessories to the inside.  Even older doll houses can be made a little better.


Thursday, August 22, 2013

A new doll house that I refurbished and made furniture etc.

 
I'm finally back on for my blogs.  Here is what I started with a doll house that needed a lot of work.  Well let's get to it.  As you can see this is what the inside looked like from the back.


This is another view of the inside.


This is another view.


This is another view.


This is another view.


this is what the front of the doll house looks like at this point.


I wanted a tiled floor in the bathroom with a wood inlay in the middle.  What I did was tiled the floor and in the center made a design with popsicle sticks.  


Of course the house needed rugs so I installed carpet tiles throughout the whole house.


I also put wallpaper on all the walls in this house.


This is another one of the rooms which I wall papered and hung up border also.  You can see a fake stained glass window on the front wall of this bedroom.


This is another one of the bedrooms.


This is the kitchen area.  I put a fake wood floor down and also fake brick paper on one wall and wallpaper on the other walls.


This is the hallway area.  I wallpapered and put down carpeting also.

 
This is another one of the bedrooms in this home. 


This is a close up of the kitchen wall.


After building up the shutters and painting the house and sided the house with popsicle sticks this is what it looked like.  I also decorated the front door.


This is what the bathroom turned out looking like.  I made all the fixtures in this bathroom.  In the front window you will see a glass fixture which I made to put a solar light in it so it lights up at night.


This is one of the bedrooms.  The lamp with the red top was made from a doll skirt I bought from a garage sale which was made of safety pins and beads.  This lights up at night with a solar light.  I used a coaster for a round rug.  I made the bed out of a wooden outlet cover, I cut the top and bottom off it for the headboard and footboard.  I painted the pieces and added wood pieces.  Minature frames work great for hanging pictures.


Here is the children's room.  I made a dressing table out of balsa wood.  If you look by the front window you will see another solar light fixture.  I put them in all the rooms so they light up.


Here is the kitchen area.  I had to make cabinets, a refrigerator, stove, sink.  I also added some little jars and put little signs on them that say oatmeal, sugar, flour.  I also added a little bit of each in the jars.


Here is the hallway area.


Here's the parlour.  I made a fireplace with a plasma tv on top.  I made it also so it would light up with a solar light at night.  When it's lit it lights up the whole parlour area.  I made the table and chairs the same way as my other doll house blog.  I'm glad I was able to show you my new doll house I refurbished.  I hope this gave you some ideas.


Wednesday, August 21, 2013

Sponge Bob Square pants turned into a solar fixture.


I will be using this sponge bob square pants candy machine for this project.


I will be using this piece off of a base of a lamp.


After taking the candy machine apart here is sponge bob.


I attached the sponge bob candy machine to the top of the lamp part.  I also attached sponge Bob to the top.


I hot glued to the top clear globe over top of sponge bob, now he is inside the candy machine not on top of it.


This is another picture of the item.  I spray painted the whole thing blue as you will see in the photos below.


After I spray painted the whole thing blue I added some decorations.  I added shells, pieces of shells, rope ribbon around the top and bottom.  I also added a star in the area where the money use to go in.  I also added the top of a solar light.  The inside lights up at night.


This is a close up of the bottom.


This is a close up of the top area.  I hope this gave you some ideas about a candy machine.


Flower looking solar light made from candlestick and old light fixtures


These are the two candle stick holders I will be using for this project.


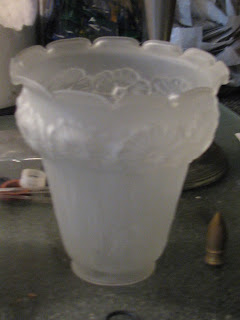
I will also be using two of these light fixture parts for this project.


I will also be using two of these lamp parts.  I used the lamp that these parts came from in one of my other blogs.  This came from a pineapple looking lamp.


I will also be using two of these light globes.


I will try to explain how I made these.  First of all I took the candle holder apart.  once I had the bar stripped I added pieces of the candle stick and if you look on the bottom you will see the pineapple looking parts then I added some more of the candlestick.  On top under the glass globe I added the light fixture pieces.  I painted the base red and added green and gold.  I then added fake pearls to the top and painted in the flower detail on the glass globes.  All I need to do now is add the top of a solar light.  


This is a close up of the top of this project.


This is a close up of the flower I did red detailing on.  This piece turned out looking like a flower, it would look great in any garden or in a front window.  I hope you got some ideas from this project.