Ad sense auto

Google analytics

Wednesday, March 21, 2018

How to make an entertainment center and a solar light tv for dollhouse


I use wooden jewelry boxes for the bookcases next to the entertainment center.  This is what I use for making bookcases also.  In this picture are two drawers out of a jewelry box.  I took off the pulls.


I use wallpaper or scrapbooking paper for wallpaper for the back wall.


I cut pieces of scrap wood for the size of the shelves for inside the bookcases.


In this picture you can see I covered the shelves tops with the same paper.  Now for gluing in the shelves I use tacky glue.


Here are the shelves in the bookcases, however I paint the bookcases the colors I want them to be before I glue in the shelves.


This is what it looks like after painting it and gluing in the shelves.


These are pieces off of a cheap elastic bracelet and little pieces off a chain belt.  I will be using them towards the end as you will see.


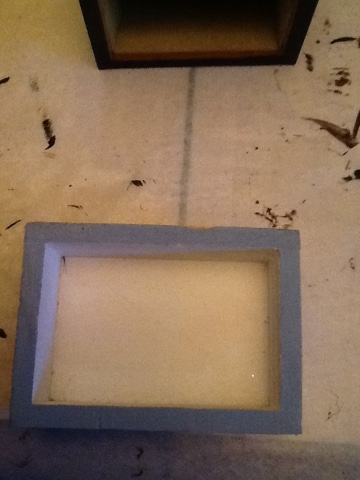
I also need this little box made of wood that will be turned into a tv.  This is the bottom of a wooden box that had hinges on it which they sell in the craft store.  I'm painting this black also to match.


This gives you an idea of what they all look like at this point.


I printed out a picture off the internet of the lion king for the screen of the tv.  I cut out this picture the size I need.


I then drilled a hole in the back of the wooden box this is where I will be putting the solar light top into.


This is the top of the solar light I need just the light part to fit through the hole.  I buy them from Walmart for 97 cents.


I glue the lion king picture over the opening area on the box.  I then need to put pieces of trim around the picture.


This is where I get thin wood trim from.  I find them all over you can see the small slats of wood.


This is what it looked like after pieces were glued together and trim around the picture screen.  I even put trim in the areas where the bookcases meet up with the tv, more finished look.


If you look on the top of the bookcases I glued on the pieces I showed you earlier from a cheap bracelet and a belt.  I also added a little decorative piece on top of the tv.  I buy these from flea markets in my area.


Here's a better look of the piece on top of the tv.


This is how it looks in the back, now to put in the solar light.  This solar light does not get glued in you need to recharge it with the sun in order for it to work.  I keep the whole light stake so I can stick it in the ground outside to charge it.


I tried to get a picture of it lit up on the tv screen, it looks nicer in person.  You can see what the doll is watching on tv.  You can also make a copy of a family picture on the copier and use that for in the tv so you child can see the family light up at night.


Here it is in the dollhouse.  Check out my other ideas for a dollhouse and use your imagination it can take you anywhere.


Monday, March 19, 2018

Making an antique looking bathtub for your dollhouse


This is the bathtub I am going to show you how to make.


You will need Popsicle sticks for the siding on the sides of the tub.


You will also need some cheap earrings for the decorative pieces.  I buy earrings from the flea market for $1.00  you can get a lot of beautiful pieces if you take the earrings apart.  You will need the backing pieces off the back of the earrings for the faucet handles.


You need to cut out four pieces of strip wood to make the sides of the tub.  I just use what ever strips of wood I have laying around.  The large paint sticks you get free at the paint store for mixing paint would work for this also.  The length of the pieces you will need are two  4 inch long pieces and two  1 7/8 inch pieces. It all depends on the size tub you want to make.


You will need a piece of thin wood to make a bottom of the tub.  Once the tub pieces are put together then you will be able to cut a piece of this wood for the bottom.


The first thing you need to do is hot glue one of the short pieces on one of the long pieces.  Make sure the short one is hot glued to the inside of the other piece.


Then you hot glue on another one of the long pieces on.


You then hot glue the last piece on.


This is a piece of the thin wood that I cut to the size of the bottom of the tub.


I hot glued the thin piece to the bottom.


This is another view of the bathtub.


Now it's time to cut the Popsicle sticks for the sides of the tub.  You can see in the photo the first stick.


This is one side with the Popsicle sticks done.


Here is another side done.


I did three sides with the sticks, not all four sides.  I wanted it to sit flush against the wall.


I then put Popsicle sticks around the top ledge to have a hangover on the tub.


Here's what it looks like with all three sides done.


I then painted it all with dark brown paint.  After it dried I used sandpaper and made it look old.


This is another view.  In the picture you can see the earrings that I took the posts off of.  I also took the cameo out of an earring.  And the backing that hold the earrings on your ears.


In the photo you can see I hot glued the three pieces off the earrings on the front and I used the two backing for the water faucet handles.  You can use your imagination for a faucet.


I wanted to show you what I use for cutting the popsiclesticks and other wood strips.


If you do dollhouse things this is a must to have.


You can even cut angles with it.


Tuesday, March 6, 2018

Making shutters for dollhouse that look old. Farmhouse style.


The first thing I did was cut down some strips of wood to the size I wanted my shutters to be.


I then took a pencil and made three lines going down the shutters.  I then took a small screwdriver and went down the lines digging out a groove with the screwdriver.


I then picked out a brown paint that I wanted to use.  I went with the darker shade. I painted all the shutters with the dark brown paint.  I than took a piece of sandpaper after they were dry and sanded them so they looked as if they were old and worn.


I used popsiclesticks to make two slates of wood across the shutter as you will see, but first I painted them to match.


In this picture you can see the shutters with the wood slates across the shutters.  I also used the end of the paint brush the handle end to make the nail heads on the cross boards.  I dipped the handle in black paint and just dotted the shutter boards.  Why buy items for your dollhouse when you can customize it yourself.


Making a roof for dollhouse out of poster board


This is the poster board I'm using for the roof, the other side has a color but I want a white roof.


I'm using one of the roof shingle strips that I kept from another project.  This is my template.


I traced around the roof template with a pencil.  You need to make as many of these that you need for the roof.  Make sure you also pencil the area of the slit areas that need to be cut out.


You also need some strips of the poster board which will be the first row.


In this picture you can see the strip on the bottom.  You can glue it on with tacky glue or wood glue.


Now you take one of the pieces of the shingles and glue it down on top of the strip.  Where the slits are cut out they should cover the white part of the strip.


The second row should overlap the first row of the shingles.  Make sure the lines that are cut out are staggered.


Another view.  Next picture you see will be the whole roof done.


I painted the roof shingles to look like slate ones.   Look at my next blog if you want to know how to make the shutters.